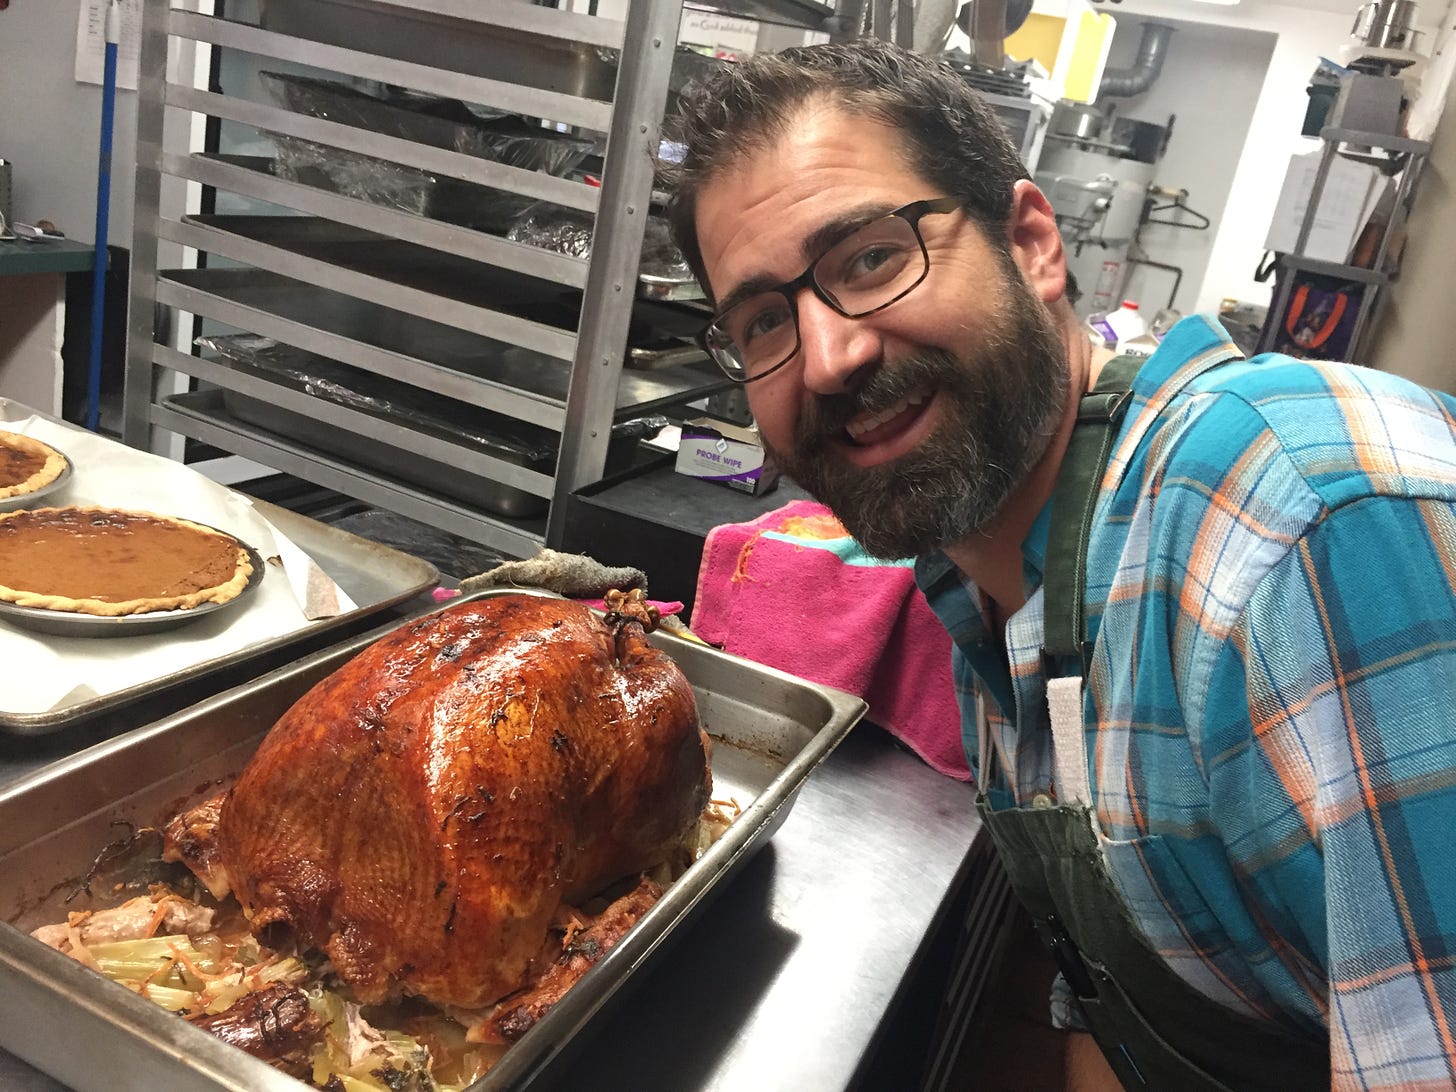
So many people are intimidated by cooking the Thanksgiving Turkey. And there are almost as many turkey roasting recipes as there are embarrassing Thanksgiving dinner disaster stories. Back in my butcher days, at the height of the holiday season, my shop would get more calls asking for cooked turkeys than for anything else. When we would tell our guests that we only sold raw birds, you could hear the dread in their voices as reality sank in. They’d have to cook the turkey themselves.
But baking that bird doesn’t have to be a burden. A few hacks I’ve learned over the years—and a detailed recipe at the end of this post—should help you get through the big day with your pride and your kitchen intact. And if all else fails, it helps to have a nip of “kitchen helper” bourbon in case the kitchen gets a little too hot.
Defrosting
Most turkeys come frozen these days, and folks have very little experience with defrosting such a large piece of meat. The biggest risk to cooking a par-frozen bird is serving raw poultry. In addition to unappetizing appearance and texture, the risk of salmonella or other bacterial infection is higher in meats cooked below 160 degrees.
It can feel like geologic times when waiting for your turkey to thaw in the fridge. Plan one day for every 5 lbs. of meat. To speed up the process, my mom always filled the kitchen sink with water. This method takes ~6-10 hrs. (1 hour for every two lbs.). But sinks are seldom deep enough to submerge the whole bird, resulting in uneven thawing and exposure to bacteria. You also end up monopolizing the kitchen sink during one of the busiest cooking times of the year. Here are my tips for the best defrosted bird.
Cold Plunge: Thawing a turkey in cold water is the way to go, but use a polycarbonate food-storage container (24-36 qt.), or an ice chest. Keep the turkey in its original wrap. Double bag it in an (unscented) kitchen garbage bag if you see any holes or tears.
Turkey Tsunami: Don’t fill your defrosting container with water before putting the bird in, unless you want a mess! Keep it near the sink, or in the garage, and check the temp every 30 minutes. If the water gets above 40 degrees, add a few ice cubes to keep out bacteria.
Deep End Defrost: What if you don’t have 6 hours? For Southern California folks, in a pinch, I've used a swimming pool to thaw my bird. Although the USDA wouldn't approve, the large volume of water rapidly defrosts most anything. My turkey was thawed in less than two hours. Definitely double bag it and remove all air to ensure you don't get a chlorinated bird.
Seasoning
Properly seasoning your food really is the most essential art of cooking. And when I say seasoning, I mean salt. I’m shocked—even in my own cooking—how this simplest of culinary tasks is often overlooked. Time and time again, I have found the biggest difference between a delicious restaurant meal, and the bland plate you have to choke down at Grandma’s house, is how much salt was used to prepare the food.
It’s hard enough to properly season a dish, but when it comes to whole animal cooking—which is what you’re doing when you roast that broad breasted tom for Thanksgiving—getting salt into all those nooks and crannies isn’t gonna happen by just sprinkling some salt on the surface. That’s where brining comes in handy.
Placing your bird in a salt water bath before you bake it is one of the best ways to get that salt where it needs to go. Dunking that gobbler in a saline solution (90 minutes per pound for no more than 24 hours) allows the bird to really soak up all that flavor. If you add aromatics like bay, rosemary, garlic, cloves, or juniper berries to your brine, those salt crystals will have the added bonus of carrying holiday aromas deep into the bird.
No Salt left behind: Don’t forget to boil the water just before you add the salt and aromatics. This will allow the salt to completely dissolve into the liquid, and not settle at the bottom of your container.
Make a turkey tea: Before the brine cools, add the aromatics to make a “tea” that will infuse your turkey (don’t worry if the water starts to discolor).
A spoonful of sugar: You can also add half a cup of sugar, honey or maple syrup to intensify the saltiness (I know it sounds backwards, but it works).
Flood warning: As with thawing, don’t add your turkey to your brine. Add your brine to your turkey. Use the same large food-storage container (24-36 qt.) or ice chest. Just remember to give it a good cleaning first.
Roasting
Let’s get down to business. Roasting a turkey is pretty straight forward, although there are lots of steps. This may seem like a lot of fuss, but remember, you probably are only cooking this gobbler once or twice a year, so stop complaining and get cooking.
Temper..temper…temper: No, I’m not talking about coping with the In-Laws. The real secret to making sure that this bird isn’t under/overcooked is to let it get as close to room temperature as possible before cooking. Life often gets in the way of good cooking, and folks forget to let their meats come to room temperature before throwing them in the oven. Germaphobes, listen up! You’re more likely to get salmonella from an undercooked bird than an over-tempered one. After taking it out of the fridge, let a thoroughly thawed turkey rest on the counter for AT LEAST two hours before putting it in the oven. This ensures no pink parts at the other end.
Ultimate skin care routine: If you want that beautiful brown and crispy skin, you’ve got to separate things. Making space between the skin and meat encourages skin moisture loss and renders fat, all leading to browning. I learned this trick from a Peking Duck chef who would inflate his whole birds with a bicycle pump. But don’t worry, you don’t need an air compressor in your kitchen. Glove up a hand and gently separate the skin from the breast, thigh, and leg meat. The added space also begs to be crammed full of compound butter, adding a whole other county to flavor country.
Basting=browning: A lot of people complain about basting because it slows the cooking time. However, I find it evens out the browning process, and ensures moist white meat (an elusive achievement in turkey cooking). My favorite basting liquid is a bottle of cheap Chablis and a stick of butter. Keep the liquid in a pot on the stove (hot but not boiling), and add a few squirts every 20 minutes to the bird. After two hours, the pot should be empty with the entire contents in the roasting pan. If it’s a big bird, continue basting from the roasting pan every temp check.
Restraining order: Finally, when your bird’s thigh meat reads 160 degrees on your trusty digital thermometer—NO “buttons” or analog temp gauges allowed—it’s time to take it out of the oven. But WAIT! You have to rest the meat before you carve. Account for at least 30 minutes of resting to let the bird finish cooking, and the meat to retain any remaining moisture. Otherwise, you’ll be burning your hands carving through your bird while all that delicious liquid you worked so hard to lock in, dribbles off the cutting board onto the floor.
Now Get Cooking
Remember, at the end of the day, it's just dinner. These tips will help ensure success, but don't let turkey anxiety ruin your holiday. Every experienced cook has at least one turkey disaster story in their back pocket—it's practically a rite of passage. Just keep this guide handy, maybe pour yourself that bourbon I mentioned earlier, and have fun with it. After all, the best ingredient in any holiday meal isn't the perfect technique or even quality ingredients (although those help!)—it's the time around the table that we share with the people who matter most to us.
Also if you haven’t already, follow me on social: Instagram, Facebook, or LinkedIn.
Keep reading with a 7-day free trial
Subscribe to Enlightened Omnivore to keep reading this post and get 7 days of free access to the full post archives.


